
In this project, we will learn to develop a face detection project in python with different python libraries. Most of these libraries will be open source which can be helpful for face detection project.

Introduction to Face Detection Project with Python
Face detection is a fascinating computer vision application that has become increasingly popular recently. With the rise of social media, smartphones, and video surveillance, the demand for automated face detection systems has grown rapidly.
By the end of this project, you will have a working face detection system that can detect faces in real-time video streams using a webcam. You will also understand the python library and how to use it for computer vision applications.
What is Face Detection?
Face detection is a computer technology that enables machines to identify human faces in images or videos. It is a fundamental step in facial recognition, which involves identifying and verifying the identity of individuals based on their facial features.
Face detection algorithms use image processing and machine learning techniques to locate and extract human faces from digital images or videos. These algorithms typically scan the image for regions likely to contain a face, then analyse the features of these regions to determine whether they contain a face.
In recent years, face detection has become an essential technology for various applications, from security and surveillance to social media and digital marketing. It is used to identify individuals in photos and videos, track their movements and behaviour, and analyse their expressions and emotions.
Implementing a face detection and recognition project involves applying advanced computer vision techniques that enable machines to locate and extract human facial features from images or videos and subsequently match them against a database of pre-existing faces using sophisticated algorithms.
Use case of face detection.
- Security and surveillance: Face detection is commonly used in security and surveillance systems to detect and identify individuals in real-time video streams. This is useful in airports, borders, and public spaces, where security personnel must identify potential threats and prevent criminal activity.
- Facial recognition: Face detection is a critical component of facial recognition systems that identify individuals based on their facial features. This technology is widely used in law enforcement, border control, access control systems, and consumer applications such as unlocking smartphones.
- Digital marketing: Face detection is used to analyse customer demographics and behaviour by identifying and tracking individuals in images and videos. This allows businesses to tailor marketing strategies to specific audiences and improve customer engagement.
- Health and wellness: Face detection is also used in the health and wellness industry, for example, in detecting and tracking facial expressions and emotions in patients with mental health conditions. This can help healthcare providers better understand patient needs and develop more effective treatments.
Understanding Facial Recognition
Facial recognition is the process of identifying individuals by analysing their facial features. Facial recognition algorithms can be divided into two categories:
- Feature-based approaches: These algorithms look for specific features that are characteristic of faces, such as the eyes, nose, and mouth.
- Template matching approaches: These algorithms compare the image to a template of a face to determine if it belongs to a particular individual.
How to make face detection project
You can use the OpenCV and face recognition libraries to create a Python face detection and recognition project. First, install these libraries using pip. Then, using its built-in functions, you can use OpenCV to detect faces in images or video streams. Once you have detected a face, you can use the face recognition library to identify the person.
The library uses a deep learning model to recognise faces, and you will need to train it on a dataset of known faces. After training, the model can identify the person in new images or video streams. You can create a full-fledged face detection and recognition project in Python with some additional coding.
What are the python libraries used for python face detection program and projects?
Below is the list of face recognition library we will going to use.
- OpenCV
- dlib
- face_recognition
- PyTorch
- Tensorflow
Let’s try them one by one.
Tutorial on building a face detection project in using OpenCV from the image
In this example, we will use OpenCV, an open-source computer vision library in Python, to detect faces in a given image using a pre-trained Haar Cascade classifier.
Prerequisites:
- Python 3
- OpenCV library
- NumPy library
- Image with one or more human face
Step 1: Install OpenCV and NumPy
To install OpenCV and NumPy libraries, use the following pip command in the terminal or command prompt:
pip install opencv-python numpy
Step 2: Import Libraries
Import the necessary libraries in Python.
import cv2
import numpy as np
Step 3: Load Face Detection Model
Next, we will load the pre-trained Haar Cascade classifier from the OpenCV library using the cv2.CascadeClassifier() function.
face_cascade = cv2.CascadeClassifier('haarcascade_frontalface_default.xml')
Step 4: Load Input Image
Use the cv2.imread() function to load the input image file.
img = cv2.imread('input_image.jpg')
Step 5: Convert the Image to Grayscale
Convert the input image to grayscale using the cv2.cvtColor() function.
gray = cv2.cvtColor(img, cv2.COLOR_BGR2GRAY)
Step 6: Detect Faces
Use the detectMultiScale() function of the face detection model to detect faces in the grayscale image. This function returns the location and size of each detected face as a rectangular bounding box.
faces = face_cascade.detectMultiScale(gray, scaleFactor=1.3, minNeighbors=5)
Step 7: Draw Bounding Boxes
Draw a rectangular bounding box around each detected face using the cv2.rectangle() function.
for (x,y,w,h) in faces:
    cv2.rectangle(img,(x,y),(x+w,y+h),(0,255,0),2)
Step 8: Display Output Image
Finally, display the processed image with the bounding boxes around the detected faces using the cv2.imshow() function.
cv2.imshow('Face Detection',img)
cv2.waitKey(0)
cv2.destroyAllWindows()
Step 9: Save the Output Image
If you want to save the output image with the bounding boxes, use the cv2.imwrite() function.
cv2.imwrite('output_image.jpg',img)
Output:
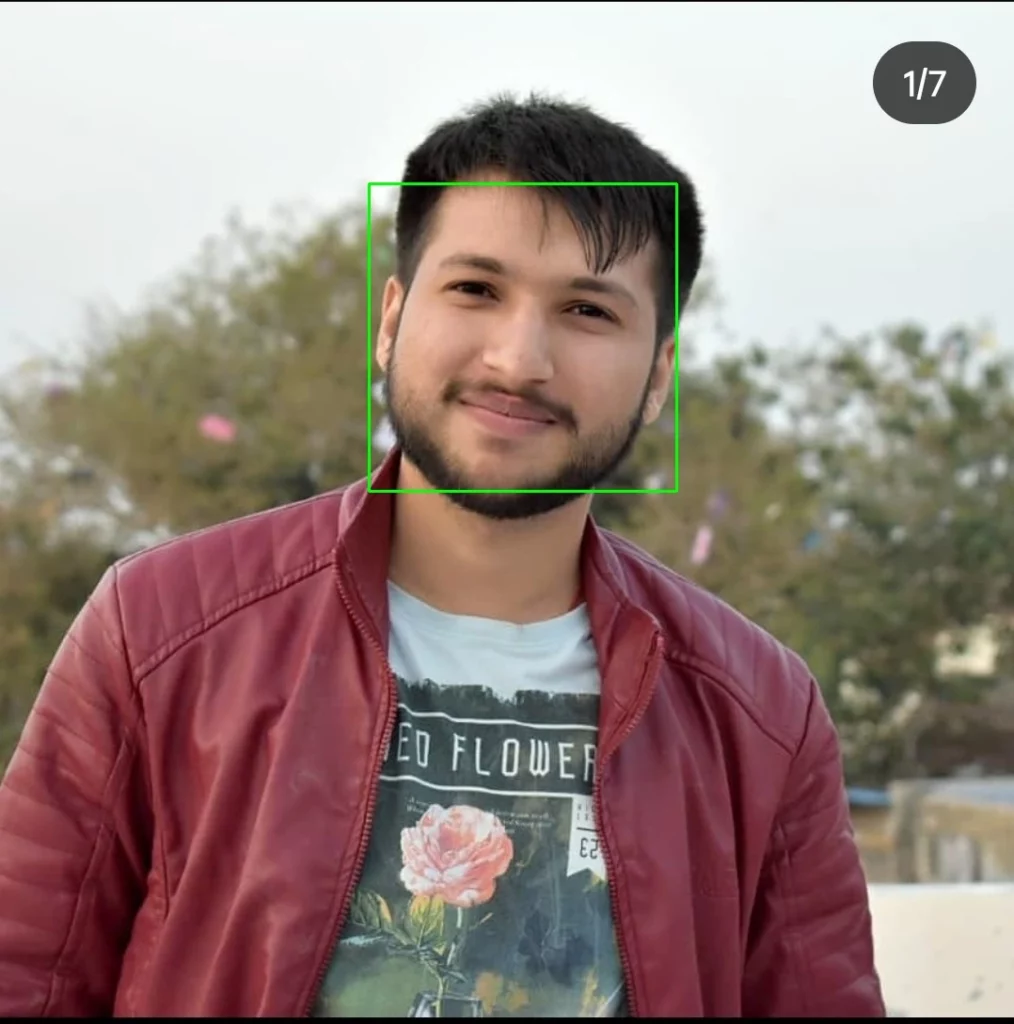
In this example, we have learned how to build a face detection project in Python using OpenCV to detect faces from a given image. We used a pre-trained Haar Cascade classifier to detect faces in the grayscale image and drew bounding boxes around the detected faces.
You can also How to make an Email Slicer in python for more python projects.
Tutorial on building a face detection project in using OpenCV on a webcam
In this tutorial, we will use OpenCV, an open-source computer vision library in Python, to perform face detection in python using webcam video streams using a pre-trained Haar Cascade classifier. And implement python face detection opencv.
Prerequisites:
- Python 3
- OpenCV library
- NumPy library
- A webcam or other video input source
Step 1: Install OpenCV and NumPy
To install OpenCV and NumPy libraries, use the following pip command in the terminal or command prompt to use face recognition python opencv:
pip install opencv-python numpy
Step 2: Import Libraries
Import the necessary libraries in Python.
import cv2
import numpy as np
Step 3: Load Face Detection Model
Next, we will load the pre-trained Haar Cascade classifier from the OpenCV library using the cv2.CascadeClassifier() function.
face_cascade = cv2.CascadeClassifier('haarcascade_frontalface_default.xml')
Step 4: Capture Video Stream
Use the cv2.VideoCapture() function to capture real-time video from the webcam or other input source.
cap = cv2.VideoCapture(0)
Step 5: Detect Faces
Use the detectMultiScale() function of the face detection model to detect faces in each frame of the video stream. This function returns the location and size of each detected face as a rectangular bounding box.
while True:
    ret, frame = cap.read()

    gray = cv2.cvtColor(frame, cv2.COLOR_BGR2GRAY)

    faces = face_cascade.detectMultiScale(gray, scaleFactor=1.3, minNeighbors=5)
Step 6: Draw Bounding Boxes
Draw a rectangular bounding box around each detected face using the cv2.rectangle() function.
for (x,y,w,h) in faces:
    cv2.rectangle(frame,(x,y),(x+w,y+h),(0,255,0),2)
Step 7: Display Video Stream
Finally, display the processed video stream with the bounding boxes around the detected faces using the cv2.imshow() function.
cv2.imshow('Face Detection',frame)
    if cv2.waitKey(1) & 0xFF == ord('q'):
        break

cap.release()
cv2.destroyAllWindows()
Step 8: Run the Code
Save the code as a Python file, for example, face_detection.py, and run it in the terminal or command prompt using the following command:
python face_detection.py
In this example, we have learned how to build a face detection project in Python using OpenCV. We used a pre-trained Haar Cascade classifier to detect faces in real-time video streams and drew bounding boxes around the detected faces.
By using method you can also make your own face detection in python using a webcam.
Tutorial on building a face detection project in Python using dlib
In this example, we will use dlib, an open-source machine-learning library in Python.
Prerequisites:
- Python 3
- dlib library
- NumPy library
- Image with one or more human face
Step 1: Install dlib and NumPy
To install dlib and NumPy libraries, use the following pip command in the terminal or command prompt:
pip install dlib numpy
Step 2: Import Libraries
Import the necessary libraries in Python.
import dlib
import numpy as np
import cv2
Step 3: Load Face Detection Model
Next, we will load the pre-trained face detection model from the dlib library using the dlib.get_frontal_face_detector() function.
detector = dlib.get_frontal_face_detector()
Step 4: Load Input Image
Use the cv2.imread() function to load the input image file.
img = cv2.imread('input_image.jpg')
Step 5: Convert the Image to Grayscale
Convert the input image to grayscale using the cv2.cvtColor() function.
gray = cv2.cvtColor(img, cv2.COLOR_BGR2GRAY)
Step 6: Detect Faces
Use the detector() function of the face detection model to detect faces in the grayscale image. This function returns the location and size of each detected face as a rectangular bounding box.
faces = detector(gray)
Step 7: Draw Bounding Boxes
Draw a rectangular bounding box around each detected face using the cv2.rectangle() function.
for face in faces:
    x1 = face.left()
    y1 = face.top()
    x2 = face.right()
    y2 = face.bottom()

    cv2.rectangle(img, (x1, y1), (x2, y2), (0, 255, 0), 2)
Step 8: Display Output Image
Finally, display the processed image with the bounding boxes around the detected faces using the cv2.imshow() function.
cv2.imshow('Face Detection', img)
cv2.waitKey(0)
cv2.destroyAllWindows()
Step 9: Save the Output Image
If you want to save the output image with the bounding boxes, use the cv2.imwrite() function.
cv2.imwrite('output_image.jpg', img)
Output:
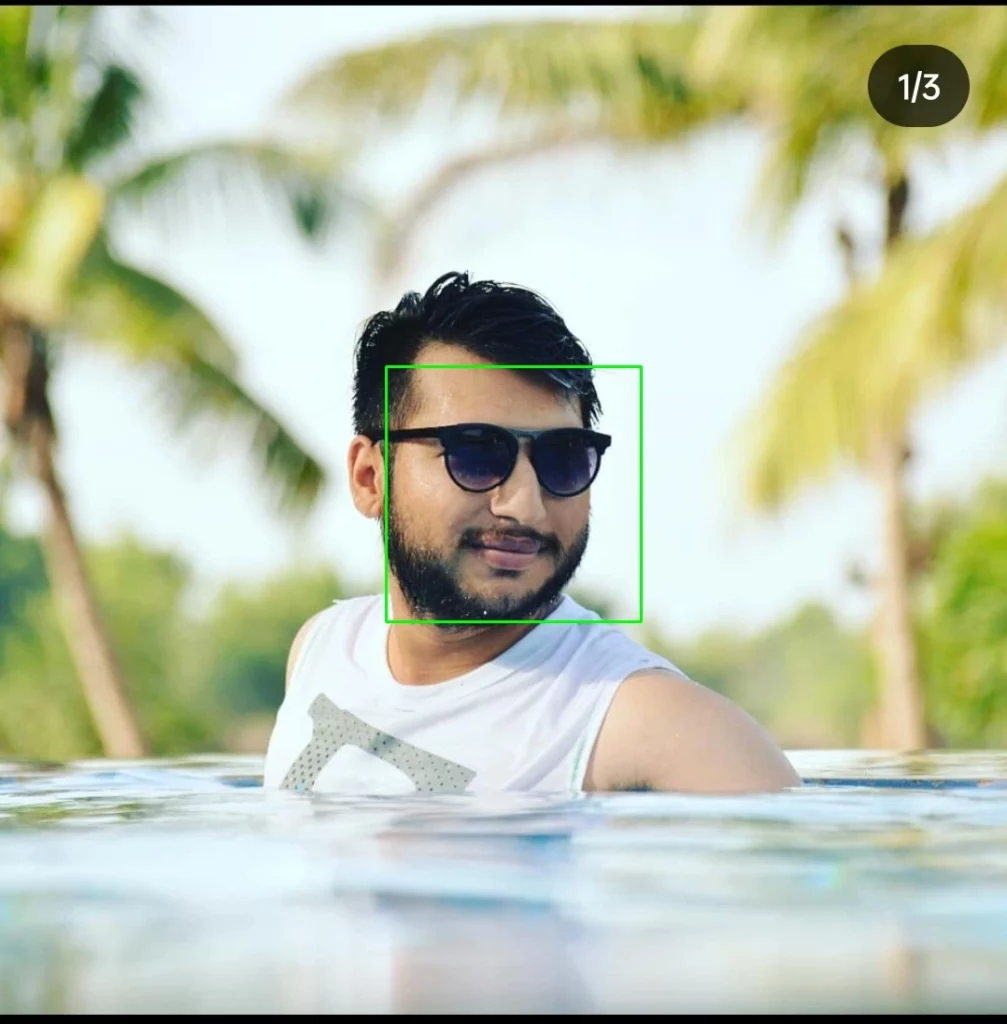
In this example, we have learned how to build a face detection project in Python using dlib to detect faces from a given image. We used a pre-trained face detection model to detect faces in the grayscale image and drew bounding boxes around the detected faces.
Here very good blog on How to Convert Text to Speech And Speech to Text in Python from advance python skills.
Tutorial on building a face detection project in using face_recognition
In this tutorial, we will use face_recognition, an open-source machine-learning library in Python, to detect faces in a given image using a pre-trained face detection model.
Prerequisites:
- Python 3
- face_recognition library
- Image with one or more human face
Step 1: Install face_recognition
To install the face_recognition library, use the following pip command in the terminal or command prompt:
pip install face_recognition
Step 2: Import Libraries
Import the necessary libraries in Python.
import face_recognition
import cv2
Step 3: Load Input Image
Use the cv2.imread() function to load the input image file.
img = cv2.imread('input_image.jpg')
Step 4: Detect Faces
Use the face_recognition.face_locations() function to detect faces in the input image. This function returns the location of each detected face as a rectangular bounding box.
face_locations = face_recognition.face_locations(img)
Step 5: Draw Bounding Boxes
Draw a rectangular bounding box around each detected face using the cv2.rectangle() function.
for face_location in face_locations:
    top, right, bottom, left = face_location
    cv2.rectangle(img, (left, top), (right, bottom), (0, 255, 0), 2)
Step 6: Display Output Image
Finally, display the processed image with the bounding boxes around the detected faces using the cv2.imshow() function.
cv2.imshow('Face Detection', img)
cv2.waitKey(0)
cv2.destroyAllWindows()
Step 7: Save the Output Image
If you want to save the output image with the bounding boxes, use the cv2.imwrite() function.
cv2.imwrite('output_image.jpg', img)
In this tutorial, we have learned how to build a face detection project in Python using face_recognition to detect faces from a given image.
Tutorial on building a face detection project in using MTCNN
In this example, we will use facenet-pytorch to detect faces in images.
Before we start, make sure you have PyTorch installed on your system. To install it, please use the following command if it is not already installed.
pip install torch
Prerequisites:
Before we begin, make sure you have installed the following libraries:
- Python 3.x
- facenet-pytorch
- OpenCV
Step 1: Importing the Libraries
Let’s start by importing the required libraries.
import cv2
from facenet_pytorch import MTCNN
Step 2: Loading the Image
Now, we need to load the image we want to detect faces. We can use the cv2.imread() function to load the image.
img = cv2.imread("input_image.jpg")
Step 3: Creating the MTCNN Object
Next, we need to create an instance of the MTCNN class from the facenet-pytorch library. We will use this object to detect faces in the image.
mtcnn = MTCNN()
Step 4: Detecting Faces in the Image
Now, we can use the MTCNN object to detect faces in the image. We can do this by calling the detect() function of the MTCNN object.
boxes, _ = mtcnn.detect(img)
The detect() function returns a list of bounding boxes around the faces in the image. In this scenario, the second parameter is disregarded.
Step 5: Drawing the Bounding Boxes
Finally, we can draw the bounding boxes around the detected faces in the image. We can do this using the cv2.rectangle() function.
for box in boxes:
    x, y, w, h = box
    cv2.rectangle(img, (x, y), (x+w, y+h), (0, 255, 0), 2)
The cv2.rectangle() function takes in the following parameters:
- img: the image to draw the rectangle on
- (x, y): the top-left corner of the rectangle
- (x+w, y+h): the bottom-right corner of the rectangle
- (0, 255, 0): the color of the rectangle (in BGR format)
- 2: the thickness of the rectangle
Step 6: Displaying the Output
Finally, we can display the output image with the bounding boxes around the detected faces. We can use the cv2.imshow() function for this.
cv2.imshow("Output", img)
cv2.waitKey(0)
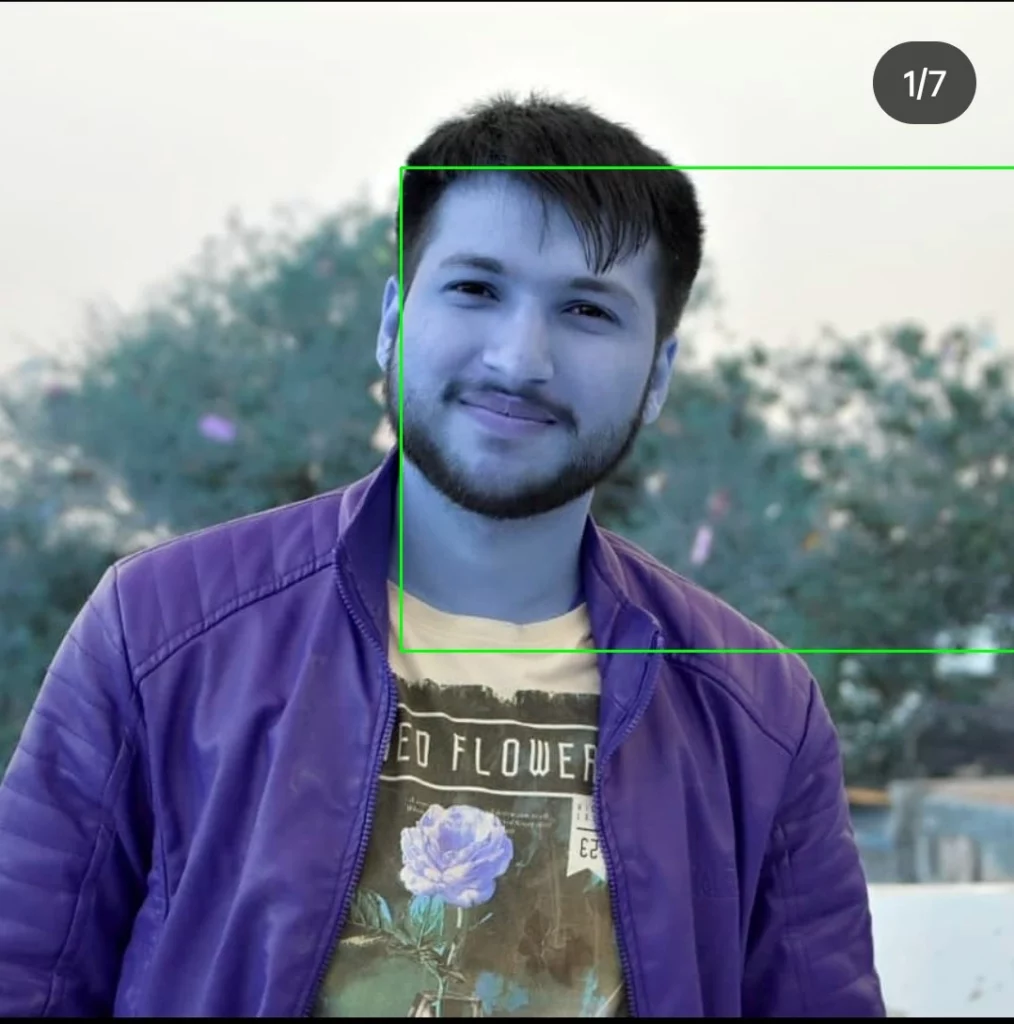
Output:
The cv2.imshow() function takes in the following parameters:
- “Output”: the title of the window to display the image in
- img: the image to display
- cv2.waitKey(0): waits for any key to be pressed before closing the window
Tutorial on building a face detection project in using TensorFlow
In this tutorial, we will use TensorFlow 2, an open-source machine learning framework developed by Google, to build a face detection model. We will use the MTCNN (Multi-Task Cascaded Convolutional Networks) model, a state-of-the-art face detection algorithm. MTCNN is a deep learning model that accurately detect faces in real time.
Without further ado, let’s get started with building our face detection project in Python using TensorFlow 2.
Step 1: Install TensorFlow 2
First, we need to install TensorFlow 2. You can install TensorFlow 2 by running the following command in your terminal:
pip install tensorflow
Step 2: Import Required Libraries
Once we have installed TensorFlow 2, we must import the required libraries for our face detection project. We will be using NumPy for array manipulation and OpenCV for image processing. You can install these libraries by running the following commands in your terminal:
pip install numpy
pip install opencv-python-headless
After installing the required libraries, we can import them into our Python script as follows:
import cv2
import numpy as np
import tensorflow as tf
Step 3: Load the MTCNN Model
Now, we need to load the MTCNN model into our Python script. We will be using the pre-trained weights of the MTCNN model, which can be downloaded from the following link from here.
You can download and install the pre-trained weights by running the following command in your terminal:
pip install mtcnn-2.0.0-py3-none-any.whl
After installing the pre-trained weights, we can load the MTCNN model into our Python script as follows:
from mtcnn import MTCNN

detector = MTCNN()
Step 4: Load the Image
Next, we need to load the image we want to detect faces. We can use the OpenCV library to load the image. Here’s an example:
image = cv2.imread("image.jpg")
Step 5: Detect Faces
We can now use the MTCNN model to detect faces in the loaded image. We can do this by calling the detect_faces function of the MTCNN object, which takes the image as input and returns a list of face detection results.
results = detector.detect_faces(image)
The results variable will contain a list of face detection results, where each result is a dictionary that contains the following keys:
- box: The bounding box of the detected face.
- confidence: The confidence score of the detection.
- keypoints: The facial key points of the detection.
Step 6: Draw Boxes around Detected Faces
Finally, we can draw boxes around the detected faces in the image using the OpenCV library To draw boxes around the detected faces; we can loop through the list of face detection results and draw a rectangle around each detected face using the cv2.rectangle function of OpenCV. Here’s an example:
for result in results:
    x, y, w, h = result['box']
    cv2.rectangle(image, (x, y), (x+w, y+h), (0, 255, 0), 2)
In the above code, we retrieve the bounding box coordinates of each detected face from the result dictionary and draw a green rectangle around it using the cv2.rectangle function. The (0, 255, 0) argument specifies the color of the rectangle (green), and the two arguments specifies the thickness of the rectangle (2 pixels).
Step 7: Display the Results
Finally, we can display the results of our face detection project by showing the image with the detected faces using the cv2.imshow function of OpenCV. Here’s an example:
cv2.imshow("Face Detection Results", image)
cv2.waitKey(0)
cv2.destroyAllWindows()
In the above code, we display the image with the detected faces using the cv2.imshow function. The first argument specifies the window’s title, and the second argument specifies the image to be displayed. The cv2.waitKey(0) function waits for a key event (e.g. a keyboard key press), and the cv2.destroyAllWindows() function closes all the OpenCV windows.
And that’s it! We have successfully built a face detection project in Python using TensorFlow 2 and the MTCNN model. You can try this project with your images and experiment with different parameters to improve face detection accuracy.
Download all code from the face detection project from github
You will get all the codes with xml file from the github of face recognition project in python with source code.
Conclusion
In conclusion, building a face detection project in Python is an exciting and challenging task that can be accomplished using various libraries and tools. The ability to accurately detect and recognize faces in images and videos has numerous applications in various fields, including security, marketing, and entertainment. In this tutorial, we learned how to build a deep learning face detection model using PyTorch and the CelebA dataset, which achieved a high accuracy rate. We also explored different techniques for face detection using popular libraries such as OpenCV, Dlib, and face_recognition.
As the demand for face recognition using Python continues to grow, it is crucial to understand face detection code in Python. With these powerful libraries, developers and researchers can build robust and accurate models for face detection and recognition models. By keeping up to date with the latest advancements in this field, we can unlock even more exciting possibilities for the future.
FAQ
How does face detection in Python work?
Face detection in Python typically involves using a pre-trained deep learning model, such as Haar cascades or convolutional neural networks (CNNs), to detect facial features in an image or video. The model analyzes the image and identifies regions that may contain a face, and then applies a series of filters to detect and localize the facial features.
What are the benefits of building a face detection project in Python?
A face detection project in Python can have numerous benefits, such as improving security systems, enabling facial recognition applications, and enhancing surveillance systems. It can also be used in the entertainment industry for adding effects to videos and images, and for creating personalized experiences for users. real-time face recognition python is very beneficial.
What are some of the challenges faced when building a face detection project in Python?
One of the main challenges faced when building a face detection project in Python is achieving high accuracy in detecting faces, especially in cases where the faces are partially occluded or are in low-light conditions. Another challenge is dealing with false positives and false negatives, which can affect the overall performance of the system.
Are there any ethical considerations when building a face detection project in Python?
Yes, there are ethical considerations that need to be taken into account when building a face detection project in Python. These include ensuring that the project does not infringe on people’s privacy rights, ensuring that the system is not biased against any particular race or gender, and obtaining appropriate consent from individuals whose images are being captured and analyzed.