In this tutorial, we will build a rule based chatbot in python using a flask and deploy it on the flask.
WHAT EXACTLY IS A CHATBOT?
Chatbots are computer programs designed to simulate or emulate human interactions through artificial intelligence. You can converse with chatbots the same way you would have a conversation with another person. They are used for various purposes, including customer service, information services, and entertainment, just to name a few.
WHAT IS RULE BASED CHATBOT?
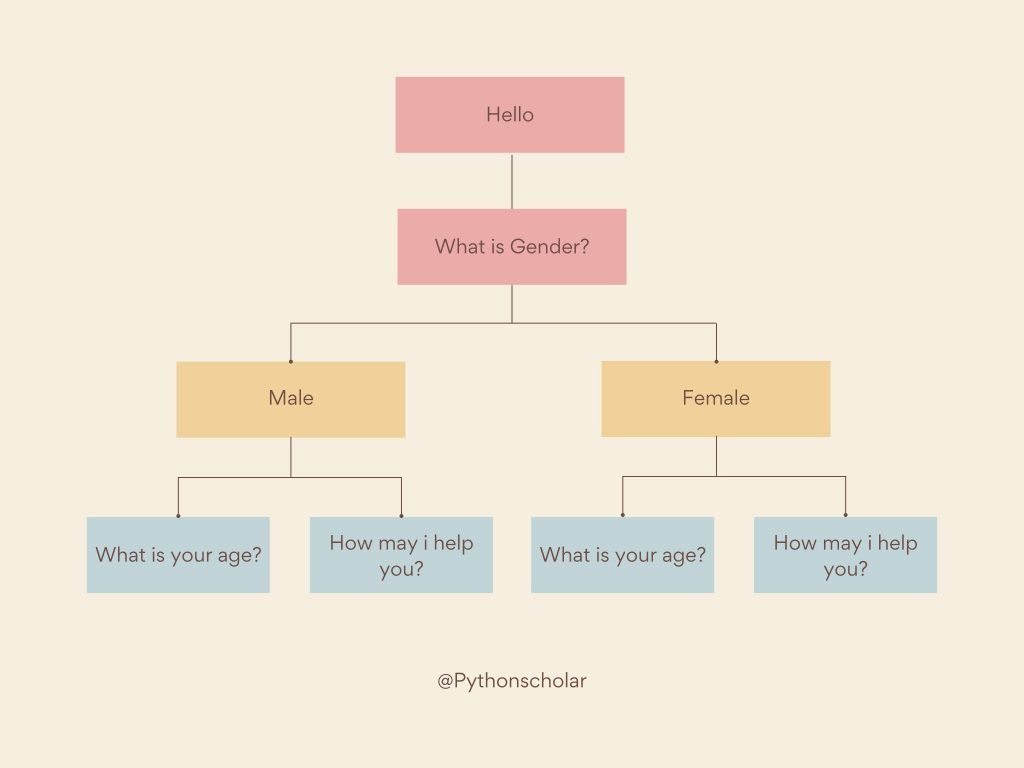
A rule-based chatbot in python is a chatbot that is guided in a sequence; they are straightforward; compared to Artificial intelligent based chatbots, this rule-based chatbot has specific rules.
Rule based chatbot python is a very fascinating thing in terms of business perspective because it helps users or customers to reach thair end goal without surfing here and there or waiting for any response from customer support or business query.
In simple words, Rule based chatbot python project are computer programs that follow a set of predetermined rules to reply to users. These programs are designed to simulate a conversation with a human being. They can be programmed by anyone who has the knowledge of programming languages such as Python, Java, and all other programming languages.
We will use a straightforward and short method to build a rule-based chatbot.
Advantages Of Rule-Based Chatbot
- Very easy to develop.
- Time-saving
Disadvantages Of Rule-Based Chatbot
- Not power and advance as AI-based Chatbot.
- Requires a large number of codes to make a full-scale chatbot.
PROJECT PREREQUISITES:
In this python project, you just need to know basic python. That includes.
- Python print() function
- Python Input / Output function
- Python flask framework
- Python functions
- Basic HTML/CSS
WHAT WILL YOU LEARN?
- End to End development of python chatbot.
- Basic Input / Output implementation.
- Flask Framework Basic
HOW TO MAKE RULE BASED CHATBOT IN PYTHON?
First, let make a very basic chatbot using basic python skills like input/output and basic condition statements, which will take basic information from the user and print it accordingly.
Step 1: First, we will variables store user information.
User_Name = None
User_Age = None
User_Job = None
Step 2: Then, we will take input from the user.
print("Hello, I'm a Chatbot \n")

User_Name = input("What is your name? ")
print("How are you {0}. \n".format(User_Name))

User_Age = input("What is your age? ")
print("Oh, so your age is {0}. \n".format(User_Age))

User_Job = input("What is your job profile? ")
print("So you're a {0}. \n".format(User_Job))
When we run the above program, we will get the following output:
Hello, I'm a Chatbot
What is your name? pythonscholar
How are you pythonscholar.
What is your age? 26
Oh, so your age is 26.
What is your job profile? python developer
So you'e a python developer.
So now, let start creating a real chatbot and deploy it on the flask.
We will use the chatterbot python library, which is mainly developed for building chatbots.
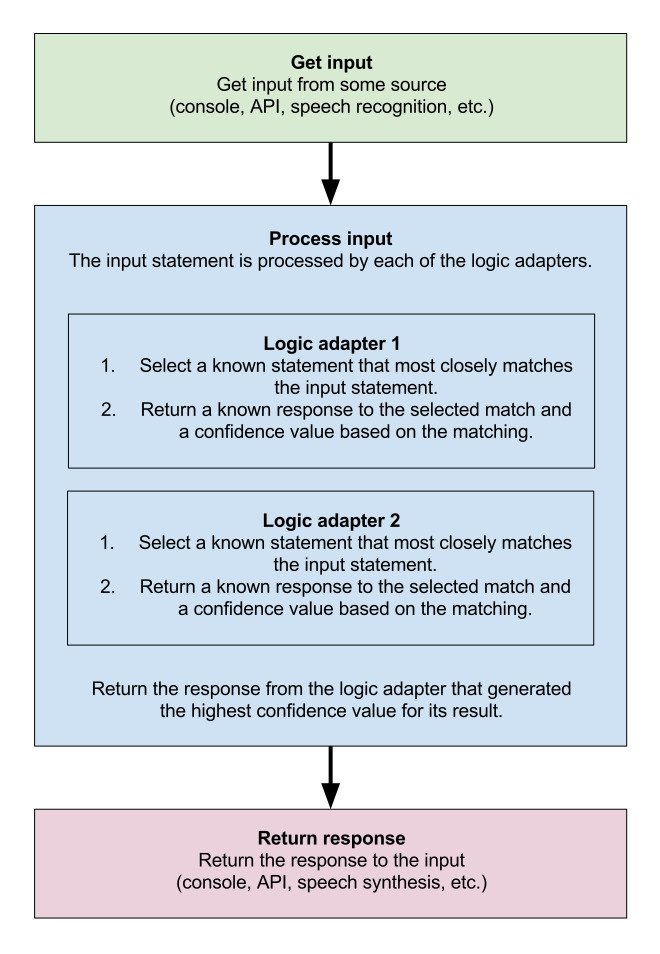
WHAT IS CHATTERBOT, AND HOW DOES IT WORK?
Chatterbot is a machine learning library that helps to generate an automatic response based on the user’s input. It uses a Natural language processing-based algorithm to generate repossessed based on user’s contexts.
You guys can refer to chatterbot official documents for more information, or you can see the GitHub code of it. Also, you can see the below chatbot flowchart to understand better how chatterbot works.
How To Install ChatterBot In Python?
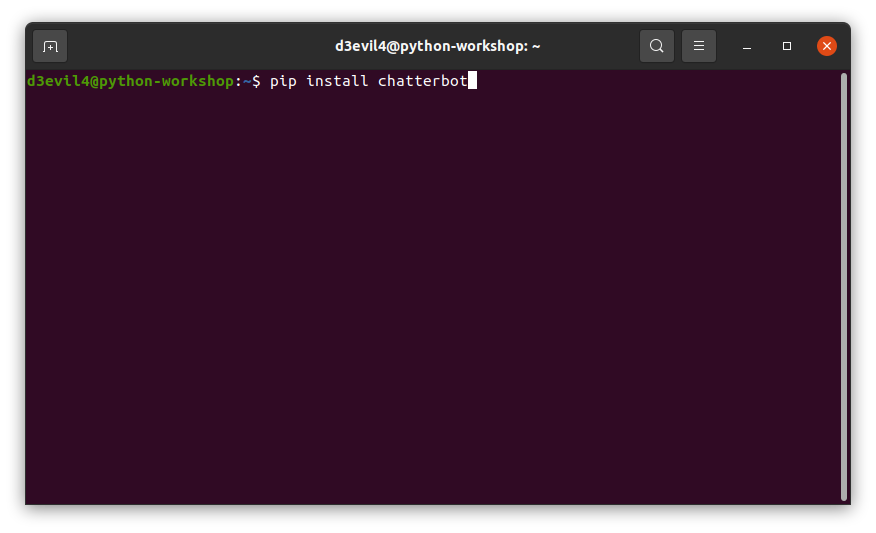
Installing chatterbot in python is very easy; it can be done using pip commend by following steps. Type below command in terminal.
pip install chatterbot chatterbot_corpus
If your guys are using google colaboratory notebook, you need to use the below command to install it on google colab.
!pip install chatterbot chatterbot_corpus
So let’s start building a chatbot by following the below steps.
Step 1: First, we will import the chatterbot library into our python file.
from chatterbot import ChatBot
from chatterbot.trainers import ChatterBotCorpusTrainer
Step 2: Then, we will name our chatbot. It can be anytime as per our need.
chatbot=ChatBot('Pythonscholar')
Step 3: We will start training our chatbot using its pre-defined dataset.
# Create a new trainer for the chatbot
trainer = ChatterBotCorpusTrainer(chatbot)
# Now, let us train our bot with multiple corpus
trainer.train("chatterbot.corpus.english.greetings",
"chatterbot.corpus.english.conversations" )
Chatterbot.corpus.english.greetings and chatterbot.corpus.english.conversations are the pre-defined dataset used to train small talks and everyday conversational to our chatbot.
Step 4: Then, we will check how our chatbot is responding to our question using the below code.
response = chatbot.get_response("How are you?")
print(response)
Now let’s run the whole code and see what our chatbot responds to.
Whole Source Code:
from chatterbot import ChatBot
from chatterbot.trainers import ChatterBotCorpusTrainer
chatbot=ChatBot('Pythonscholar')
# Create a new trainer for the chatbot
trainer = ChatterBotCorpusTrainer(chatbot)
# Now let us train our bot with multiple corpus
trainer.train("chatterbot.corpus.english.greetings",
"chatterbot.corpus.english.conversations" )
response = chatbot.get_response("How are you?")
print(response)
The Output will be as follow:
I am doing well.
As you can see, our chatbot is working like butter, and you guys can play more by changing questions inside the chatbot.get_response() function.
Currently, it is online terminal-based so let give this chatbot a life by designing the frontend and deploying it using a flask.
HOW TO DEPLOY A CHATBOT ON THE FLASK
First of all, we will install the flask library in our system using the below command.
pip install flask
And for google Colab use the below command, mostly flask comes pre-install on google colab.
!pip install flask
But first, let understand what is flask framework in python is.
What Is A Python Flask?
The Flask is a Python micro-framework used to create small web applications and websites using python. Flask works on a popular templating engine called Jinja2, a web templating system combined with data sources to the dynamic web pages.
Now start developing the flask framework based on the above chatterbot in the above steps.
We have already installed the flask in the system, so we will import the python methods we require to run the flask microserver.
Step 1: Import necessary methods of flask and chatterbot.
from flask import Flask, render_template, request
from chatterbot import ChatBot
from chatterbot.trainers import ChatterBotCorpusTrainer
Step 2: Then, we will initialise the flask app by adding the below code.
#Flask initialisation
app = Flask(__name__)
Flask(__name__) is used to create the flask class object so that python code can initialise the flask server.
Step 3: Now, we will give the name to our chatbot.
chatbot=ChatBot('Pythonscholar')
Step 4: Add training code for a chatbot.
# Create a new trainer for the chatbot
trainer = ChatterBotCorpusTrainer(chatbot)
# Now let us train our bot with multiple corpus

trainer.train("chatterbot.corpus.english.greetings","chatterbot.corpus.english.conversations")
Step 5: We will create the flask decorator and a route in this step.
@app.route("/")
def index():
    return render_template("index.html")
The route() is a function of a flask class used to define the URL mapping associated with the function.
Then we make an index function to render the HTML code associated with the index.html file using the render_template function.
In the next step, we will make a response function that will take the input from the user, and also, it will return the result or response from our trained chatbot.
Step 6: Create a function to take input from the user and respond accordingly.
@app.route("/get", methods=["GET","POST"])
def chatbot_response():
    msg = request.form["msg"]
    response = chatbot.get_response(msg)
    return str(response)
Step 7: Then, we will add the final code that will start the flask server after interpreting the whole code.
if __name__ == “__main__”:
 app.run()
The complete code will look like this.
from flask import Flask, render_template, request
from chatterbot import ChatBot
from chatterbot.trainers import ChatterBotCorpusTrainer

#Flask initialization
app = Flask(__name__)
chatbot=ChatBot('Pythonscholar')

# Create a new trainer for the chatbot
trainer = ChatterBotCorpusTrainer(chatbot)
# Now let us train our bot with multiple corpus

trainer.train("chatterbot.corpus.english.greetings","chatterbot.corpus.english.conversations")

@app.route("/")
def index():
    return render_template("index.html")

@app.route("/get", methods=["GET","POST"])
def chatbot_response():
    msg = request.form["msg"]
    response = chatbot.get_response(msg)
    return str(response)

if __name__ == "__main__":
 app.run()
As per Jinja2 implementation, we have to create two folders for storing HTML and CSS files; while working with the Jinja2 engine, it is necessary to make a folder with a name template to add HTML files, and for other files like CSS, javascript, or image we have to make a folder with the name static but it optional but creating template folder is compulsory.
First, we will make an HTML file called index.html inside the template folder.
<!DOCTYPE html>
<html>
  <head>
    <link rel=“stylesheet” type=“text/css” href=“{{ url_for(‘static’, filename=’style.css’)}}” />
    <script src=“https://ajax.googleapis.com/ajax/libs/jquery/3.2.1/jquery.min.js”></script>
  </head>
  <body>
    <div class=“row”>
      <div class=“col-md-10 mr-auto ml-auto”>
        <h1>Pythonscholar ChatBot</h1>
        <form>
          <div id=“chatbox”>
            <div class=“col-md-8 ml-auto mr-auto”>
              <p class=“botText”>
                <span>Hi! I‘m Pythonscholar.</span>
              </p>
            </div>
          </div>
          <div id=”userInput” class=”row”>
            <div class=”col-md-10″>
              <input id=”text” type=”text” name=”msg” placeholder=”Message” class=”form-control”>
              <button type=”submit” id=”send” class=”btn btn-warning”>Send</button>
            </div>
          </div>
        </form>
      </div>
    </div>
    <script>
      $(document).ready(function() {
        $(“form”).on(“submit”, function(event) {
          var rawText = $(“#text”).val();
          var userHtml = ‘ < p class = “userText” > < span > ‘+rawText + “ < /span> < /p>”;
          $(“#text”).val(“”);
          $(“#chatbox”).append(userHtml);
          document.getElementById(“userInput”).scrollIntoView({
            block: “start”,
            behavior: “smooth”,
          });
          $.ajax({
            data: {
              msg: rawText,
            },
            type: “POST”,
            url: “ /get”,
          }).done(function(data) {
            var botHtml = ‘ < p class = “botText” > < span > ‘+data + “ < /span> < /p>”;
            $(“#chatbox”).append($.parseHTML(botHtml));
            document.getElementById(“userInput”).scrollIntoView({
              block: “start”,
              behavior: “smooth”,
            });
          });
          event.preventDefault();
        });
      });
    </script>
  </body>
</html>
We will not understand HTML and jquery code as jquery is a vast topic.
We will create a style.css file, save it in the static folder, and use the below code.
body {
	font-family: Garamond;
}

h1 {
	color: black;
	margin-bottom: 0;
	margin-top: 0;
	text-align: center;
	font-size: 40px;
}

h3 {
	color: black;
	font-size: 20px;
	margin-top: 3px;
	text-align: center;
}

.row {
	display: flex;
	flex-wrap: wrap;
	margin-right: -15px;
	margin-left: -15px;
}

.ml-auto {
	margin-left: auto !important;
}

.mr-auto {
	margin-right: auto !important;
}

.col-md-10,
.col-md-8,
.col-md-4 {
	position: relative;
	width: 100%;
	min-height: 1px;
	padding-right: 15px;
	padding-left: 15px;
}

.col-md-8 {
	flex: 0 0 66.666667%;
	max-width: 66.666667%
}

.col-md-4 {
	flex: 0 0 33.333333%;
	max-width: 33.333333%
}

.col-md-10 {
	flex: 0 0 83.333333%;
	max-width: 83.333333%
}

.form-control {
	background: no-repeat bottom, 50% calc(100% – 1px);
	background-image: none, none;
	background-size: auto, auto;
	background-size: 0 100%, 100% 100%;
	border: 0;
	height: 36px;
	transition: background 0s ease-out;
	padding-left: 0;
	padding-right: 0;
	border-radius: 0;
	font-size: 14px;
}

.form-control {
	display: block;
	width: 100%;
	padding: .4375rem 0;
	padding-right: 0px;
	padding-left: 0px;
	font-size: 1rem;
	line-height: 1.5;
	color: #495057;
	border: none;
	background-color: transparent;
	background-clip: padding-box;
	border-bottom: 1px solid #d2d2d2;
	box-shadow: none;
	transition: border-color .15s ease-in-out, box-shadow .15s ease-in-out;
}

.btn {
	float: left;
	text-align: center;
	white-space: nowrap;
	vertical-align: middle;
	user-select: none;
	border: 1px solid transparent;
	padding: .46875rem 1rem;
	font-size: 1rem;
	line-height: 1.5;
	border-radius: .25rem;
	transition: color .15s ease-in-out, background-color .15s ease-in-out, border-color .15s ease-in-out, box-shadow .15s ease-in-out;
}

.btn-warning {
	color: #fff;
	background-color: #f08f00;
	border-color: #c27400;
}

.btn.btn-warning:active,
.btn.btn-warning:focus,
.btn.btn-warning:hover {
	box-shadow: 0 14px 26px -12px rgba(255, 152, 0, .42), 0 4px 23px 0 rgba(0, 0, 0, .12), 0 8px 10px -5px rgba(255, 152, 0, .2);
}

button,
input,
optgroup,
select,
textarea {
	margin: 0;
	font-family: inherit;
	font-size: inherit;
	line-height: inherit;
	overflow: visible;
}

#chatbox {
	background-color: cyan;
	margin-left: auto;
	margin-right: auto;
	width: 80%;
	min-height: 70px;
	margin-top: 60px;
}

#userInput {
	margin-left: auto;
	margin-right: auto;
	width: 40%;
	margin-top: 60px;
}

#textInput {
	width: 87%;
	border: none;
	border-bottom: 3px solid #009688;
	font-family: monospace;
	font-size: 17px;
}

#buttonInput {
	padding: 3px;
	font-family: monospace;
	font-size: 17px;
}

.userText {
	color: white;
	font-family: monospace;
	font-size: 17px;
	text-align: right !important;
	line-height: 30px;
	margin: 5px;
}

.userText span {
	background-color: #009688;
	padding: 10px;
	border-radius: 2px;
}

.botText {
	color: white;
	font-family: monospace;
	font-size: 17px;
	text-align: left;
	line-height: 30px;
	margin: 5px;
}

.botText span {
	background-color: #ef5350;
	padding: 10px;
	border-radius: 2px;
}

#tidbit {
	position: absolute;
	bottom: 0;
	right: 0;
	width: 300px;
}
We are all set to run our flask application.
So let’s start our chatbot by running a python file. Once you run the python file it will create a local server with the address http://127.0.0.1:5000/, and when you open this URL on the browser, you can see the user interface of our chatbot.
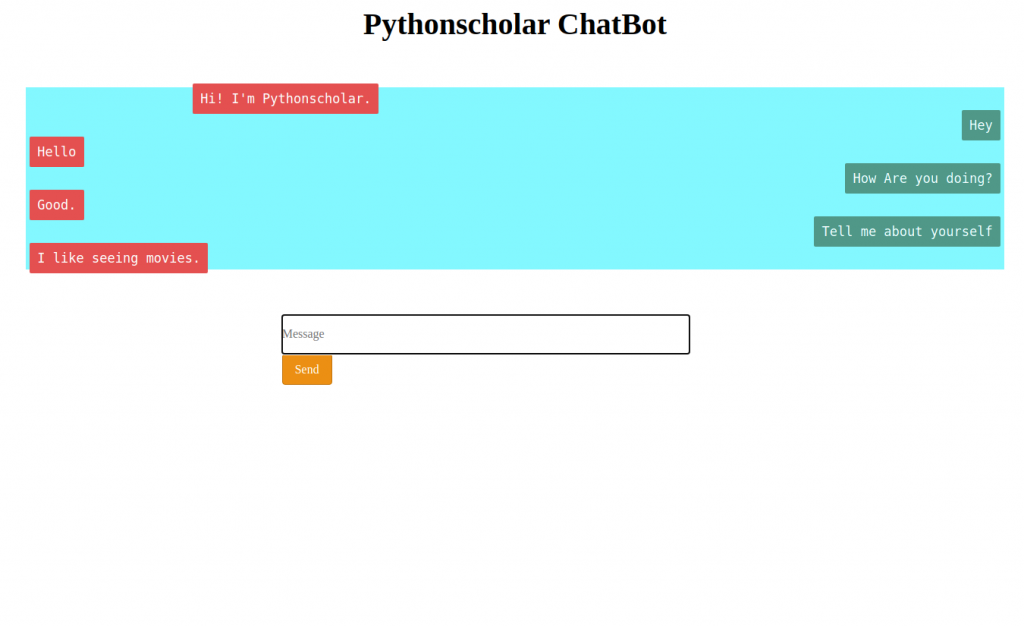
Congratulations, we have successfully built a chatbot using python and flask.
We hope you guys had fun learning this project, and you can see how we have implemented a chatbot with python and flask.
Have Fun and Happy pythoning